Setting up [Camera Image Input]
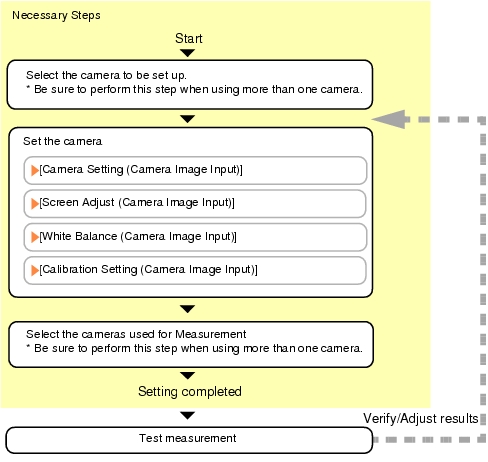
To set up Camera Image Input, follow the steps below.
 Note
Note
Operations of the ProcItem Setting window
- In the Edit Flow window, tap [Camera Image Input].
The ProcItem Setting window is displayed.
- In the "Item tab" area, tap [Camera N], where N is a Camera No., and configure imaging settings for that camera.
 Note
Note- When setting multiple cameras, repeat the procedure above for each camera.
- Select a camera number for the measurement objects.
- In the "Item tab" area, tap [Select camera].
- In the "Select setting" area, tap [
 ] for [Camera No.] and select a camera number.
After selecting cameras, please verify images displayed in the "Image display" area.
 Note
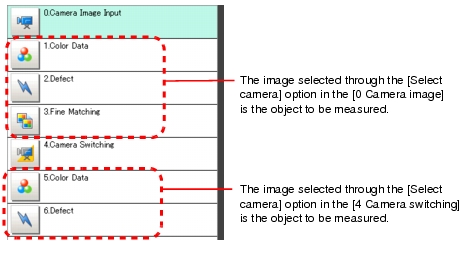
Note- The images from the camera selected in [Select camera] will be the object to be measured in the following units.
If you need to switch the camera during the process, insert a [Camera Switching] unit in the scene and switch the image source.
 Camera Switching
- Tap [OK].
After confirmation, the ProcItem Setting window will be closed.
- Perform a test measurement.
An image from the selected camera is displayed in the "Image display" area.
- Adjust the image, as necessary, if the image cannot be input properly because it is out of focus or for some other reason.
 User's Manual, "Operations of ProcItem Setting Window".
 Camera Setting Option List. For each operation, see the following:
 ] for [Camera No.] and select a camera number.
 Note
Note Camera Switching


