Setting the Items to Display: Figure (Result display)

Let's use "Display Rectangle Result" as an example to show how to set up.
Other options other than "Display Rectangle Result" are similar with this.
For the Figure Setting window for other than rectangle, see User's Manual, "Setting Figures".
  1. Select "Figure" or "Operation" for "Display position".
    Result Display - Detail Area
    When "Figure" is selected:
    1. Tap [Edit].
      Result Display - Detail Area
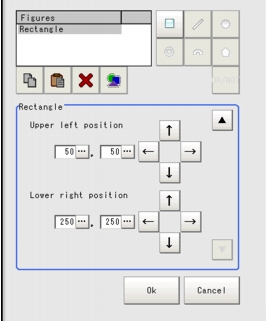
      The "Figure setting" area is displayed.
    2. Specify the coordinates using one of the Drawing Tools.
      Result Display - Detail Area
    3. Tap [OK].
    When "Operation" is selected:
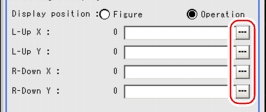
    1. Tap [...] for each item.
      Result Display - Detail Area
      The Setting Expression window is displayed.
    2. Specify the value and an expression
      How to specify an expression: Structure and Creation of Expression
  2. Specify the Style, width and color of the line if required.
    Result Display - Detail Area
    Table: Result display (Result display) - Detailed setting
    Setting Item
    Set Value
    [Factory Default]
    Description
    Style
    • [Solid]
    • Dash line
    Select the line type.
    Width
    [1] to 10
    Specify the line width.
    Color
    • [OK Color]
    • NG Color
    • Judgement
    • Arbitrary color
    Select the color of the figure.
    Note
    • For dash line, "Width" is fixed to "1".
  3. If necessary, change the title.
    1. Tap [Change title].
      Result Display - Detail Area
      A software keyboard is displayed.
      How to input text: User's Manual, "Inputting a Text"
      Up to 15 characters can be entered.
    2. Input a title and tap [OK].
      The changed title is displayed in the "Detail" area, and in the "Title" column of the "List of result display" area.
      Change Title (Result Display)
  4. Tap [OK].
    The display settings for the object are registered, and the "List of result display" area is displayed.
For the subsequent operations, see Setting up [Result Display].