[Region Setting (3D Edge Position)]
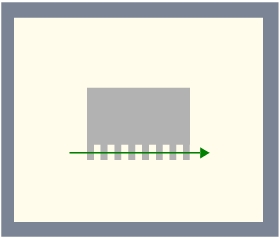
- Measurement results differ depending on the positions of the starting point and end point of the measurement region.
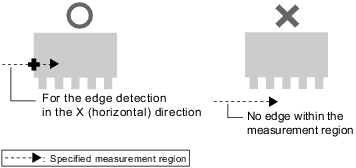
When setting up the measurement region, attention should be paid to the edge detecting direction. - When performing edge detection according to the specified edge color, measurement results vary depending on the edge detection mode even if the direction of the measurement region is the same.
For monochrome cameras, changing measurement parameter "Density change" to "Light Dark" or "Dark
  Light" will lead to different measurement results.
 - Measurement cannot be performed if there is no edge within the measurement region. When determining the size and position of the measurement region, take into account the movement range of the measured object.
- The direction of the drawn arrow can be changed by tapping [
 ] in the "Detail" area.
 - Use the Zoom function if the measurement region is too small to identify the direction of the arrow.
For the Zoom function, see User's Manual, "Using Zoom Function".
- In the "Item tab" area, tap [Region setting].
- In the "Range of height measurement" area, tap [...] for each item and specify a height range of measurement.How to input a value:
 User's Manual, "Inputting a Value"
 - When a measurement region is already registered, tap [Edit]. When no measurement region is registered, go to the Step
 4.
4. - Specify the measurement area using the Drawing Tools.
- In the "Figure setting" area, tap [OK].
For the subsequent operations, see  Setting up [3D Edge Position].


