How to Set up
The settable objects are as follows:
Table:
Figure Object List
|
|
|
|
Other Than the Result Display
|
|
Height: 201 pixels Width: 201 pixels
|
Height: 241 pixels Width: 241 pixels
|
|
|
Length: 201 pixels Width: 2 pixels
|
Length: 320 pixels Width: 20 pixels
|
|
|
|
|
|
|
Radius: 100 pixels Width: 5 pixels
|
Radius: 120 pixels Width: 10 pixels
|
|
|
Radius: 100 pixels Width: 5 pixels Start angle: 180 degrees End angle: 180 degrees
|
Radius: 120 pixels Width: 10 pixels Start angle: 0 degrees End angle: 180 degrees
|
|
|
Central coordinate X: 150 Central coordinate Y: 150
|
|
|
|
|
|
|
|
|
|
|
|
|
|
|
When an image is difficult to view or if you want to observe a region in more detail, magnify the image.
Rectangle
- Image selected
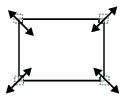
Four points are displayed at each corner.
- Dimension Adjust
- Example) To enlarge
Drag the point in the lower right corner to the lower right direction.
- Setting Item
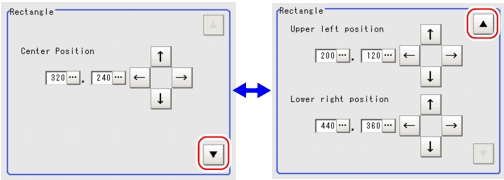
Setting items can be switched by tapping [

] or [

].
Table:
Detail Setting (Rectangle)
|
|
|
The X and Y coordinate values at the center of the rectangle are displayed. To edit each value, tap the button to the right of the value, and specify a value in the window displayed.
|
Upper left position (X, Y)
|
The X and Y coordinate values at the upper left corner of the rectangle are displayed. To edit each value, tap the button to the right of the value, and specify a value in the window displayed.
|
Lower right position (X, Y)
|
The X and Y coordinate values at the lower right corner of the rectangle are displayed. To edit each value, tap the button to the right of the value, and specify a value in the window displayed.
|
Line
- Image selected
View points of start, middle and end points of lines.
- Dimension Adjust
- Example) When changing the length of lines
Drag the points towards intended direction.
- Example) When changing the oblique direction
Drag the points towards intended direction.
- Example) When changing the line width
Drag the center points towards vertical direction of lines.
- Setting Item
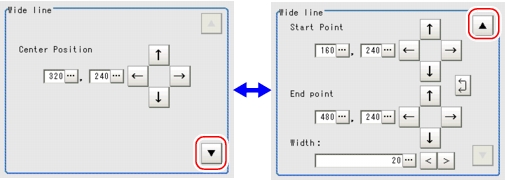
Setting items can be switched by tapping [

] or [

].
Table:
Detail Setting (Line)
|
|
|
The X and Y coordinate values at the center of the line are displayed. To edit each value, tap the button to the right of the value, and specify a value in the window displayed.
|
|
The X and Y coordinate values at the initial point of the line are displayed. To edit each value, tap the button to the right of the value, and specify a value in the window displayed.
|
|
The X and Y coordinate values at the terminal point of the line are displayed. To edit each value, tap the button to the right of the value, and specify a value in the window displayed.
|
|
The line width (thickness) is displayed. To edit each value, tap the button to the right of the value, and specify a value in the window displayed.
|
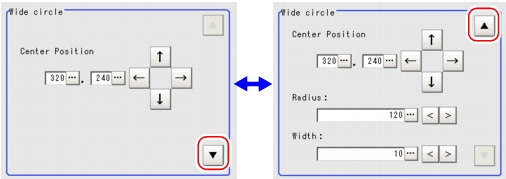
Circle/Ellipse
- Image selected
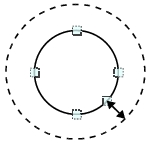
Points are displayed on the top, bottom, left, right, and lower right of the circle.
- Dimension Adjust
- Example) When circle is Zoom
Drag the point on the lower right of the circle.
- Example) To transform the circle into a horizontally long ellipse
Drag the point on the right of the circle to the right.
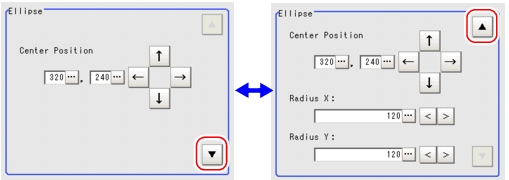
- Setting Item
Setting items can be switched by tapping [

] or [

].
Table:
Detail Setting (Circle)
|
|
|
The values of the coordinates (X, Y) at the center of the circle are displayed. To edit each value, tap the button to the right of the value, and specify a value in the window displayed.
|
|
The radius of the circle in the X-axis direction is displayed. To edit each value, tap the button to the right of the value, and specify a value in the window displayed.
|
|
The radius of the circle in the Y-axis direction is displayed. To edit each value, tap the button to the right of the value, and specify a value in the window displayed.
|
Circumference
- Image selected
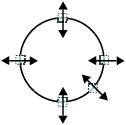
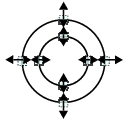
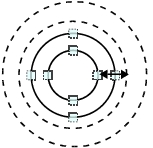
Points are displayed on the top, bottom, left, and right of both the inner and outer circles.
- Dimension Adjust
- Example) To enlarge the entire circumference
Drag a point on the outer circle.
- Example) When adjusting the width of circumference
Drag a point on the inner circle.
- Setting Item
Setting items can be switched by tapping [

] or [

].
Table:
Detail Setting (Circumference)
|
|
|
The values of the coordinates (X, Y) at the center of the circle are displayed. To edit each value, tap the button to the right of the value, and specify a value in the window displayed.
|
|
The radius of the circle is displayed. To edit each value, tap the button to the right of the value, and specify a value in the window displayed.
|
|
The width of the circumference is displayed. To edit each value, tap the button to the right of the value, and specify a value in the window displayed.
|
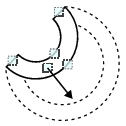
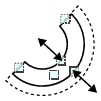
Arc
- Image selected
Points are displayed on two lines at both ends of the arcs, on the inner arc, on the outer arc, and inside the closed arc shape.
- Dimension Adjust
- Example) When arc is Zoom
Drag the point inside the arc in the outward direction.
- Example) When adjusting the width of arc
Drag the point on the inner or outer arc inward or outward.
- Example) When changing the Angle of arc (partially open)
Drag one of the points at the end of the arc.
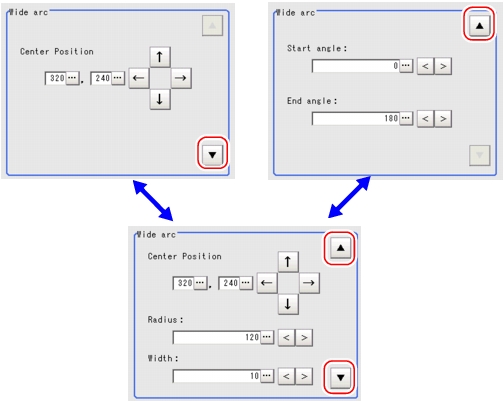
- Setting Item
Setting items can be switched by tapping [

] or [

].
Table:
Detail Setting (Arc)
|
|
|
The values of the coordinates (X, Y) at the center of the circle are displayed. To edit each value, tap the button to the right of the value, and specify a value in the window displayed.
|
|
The radius of the circle is displayed. To edit each value, tap the button to the right of the value, and specify a value in the window displayed.
|
|
The width of the arc is displayed. To edit each value, tap the button to the right of the value, and specify a value in the window displayed.
|
|
The value of the start angle is displayed. To edit each value, tap the button to the right of the value, and specify a value in the window displayed.
|
|
The value of the end angle is displayed. To edit each value, tap the button to the right of the value, and specify a value in the window displayed.
|
Cursor
- Image selected
- Setting Item
Table:
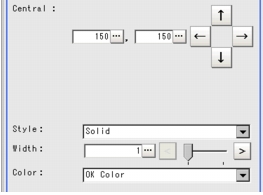
Detail Setting (Cross)
|
|
Central coordinate (X, Y)
|
The values of the coordinates (X, Y) at the center of the cross are displayed. To edit each value, tap the button to the right of the value, and specify a value in the window displayed.
|
|
The style of the line for the cross is displayed. To change the style, tap [  ] and select one.
|
|
The width of the line for the cross is displayed. To change the value, tap the button to the right and specify a value in the window displayed.
|
|
The color of the line for the cross is displayed. To change the color, tap [  ] and select one. Options are "OK color", "NG color", "Judgment", and "RGB".
|
Polygon (Triangle to Decagon)
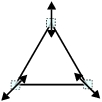
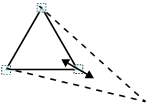
- How to draw a polygon (e.g. a quadrilateral)
- When [Polygon] is specified, a triangle is drawn at first.
- If you drag one of the sides and drop it at the point you want to make a new vertex, a new vertex will be created.
If the number of climaxes is not within 3 to 10, the image isn't deemed as a polygon.
- Image selected
Climax view point of images.
- Dimension Adjust
- Example) When changing the Angle of one point
- Example) When changing area
- Setting Item
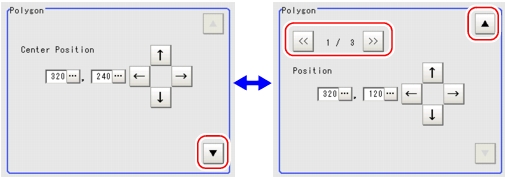
Setting items can be switched by tapping [

] or [

].
Table:
Detail Setting (Polygon)
|
|
|
The X and Y coordinate values at the center of the polygon are displayed. To change the value, tap the button to the right and specify a value in the window displayed.
|
Position (X, Y) for each vertex
|
The X and Y coordinate values of each vertex of the polygon are displayed. To edit a value, select a vertex by tapping [<<] and/or [>>], tap the button to the right of each coordinate, and specify a value in the window displayed.
|
Text
 Note
Note
Time
 Note
Note Processing Items List Manual, "Result Display".
 Processing Items List Manual, "Result Display".
