Using Method of NG Analyser
Important
- Classify sample images beforehand into the OK folder containing images you want to judge OK or NG folder containing images you want to judge NG. (The applicable file types are "*.IFZ", "*.BYR" and "*.BMP".)
- Do not input external commands or STEP signals while the NG analyser is running (excluding during non-stop adjustment).
- On the Main screen, tap [Tool] menu - [NG analyser].The analyser screen is displayed.
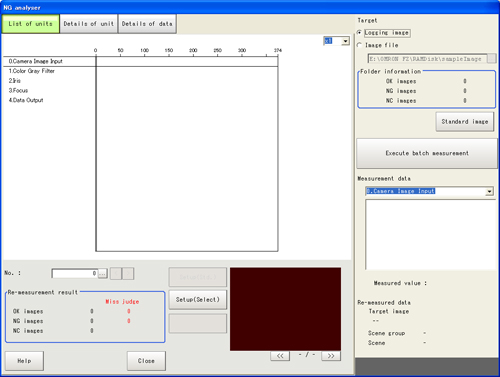
- Specify the image file.Specify the upper rank folder containing the OK and NG folders.
Although logging images of the controller can be set as the target, all logging images of the controller, if selected, are treated as "Not yet judged." You can also set a reference image to perform adjustment.
- The files in the folder are displayed.

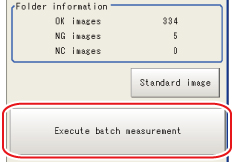
- Tap [Execute batch measurement].All images in the folder are measured in batch.
- Measurement results are displayed.The results in the OK folder are shown first, followed by the results in the NG folder.
Green indicates OK, while red indicates NG.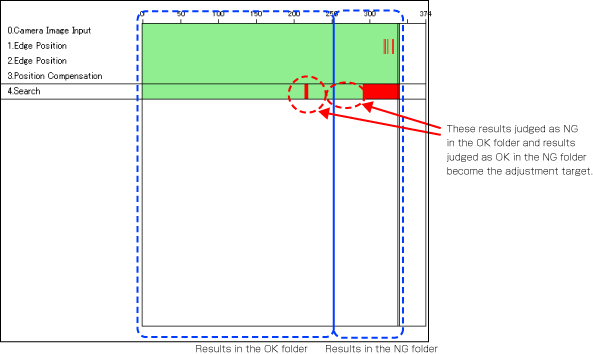 Adjust the setting values of each unit until no images are falsely judged.
 - Select the processing item to be adjusted, and tap [Details of unit].In the above example, [Search] becomes the adjustment target.
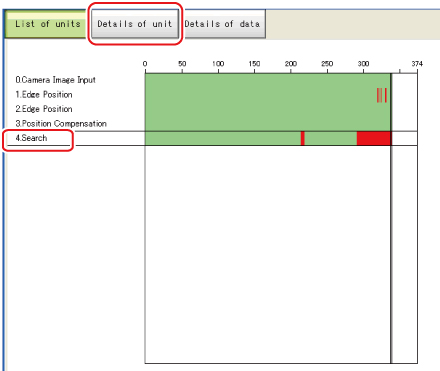
- The cause of NG is displayed. To check the details of values further, tap [Details of data].
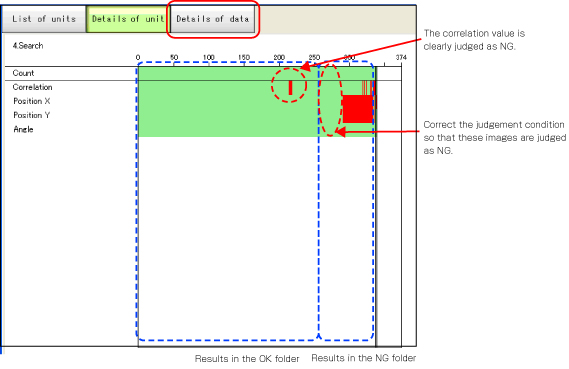
- Adjust the processing item by referring to the displayed content.In the following example, Correlation values are clearly lower on some screens.
Based on the revealed cause of false judgement, use the [Set up(Std.)] and [Set up(Select)] buttons to change the setting values of the processing unit.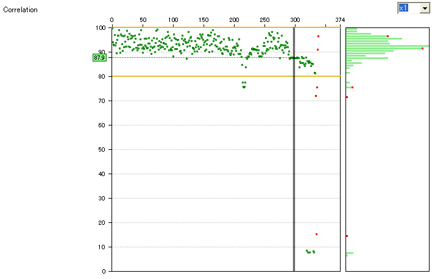
- Repeat steps 5 to 8 to correct the setting values corresponding to all causes of false judgement.
- Select [Execute batch measurement] to confirm that no images are falsely judged.If there are still falsely judged images, repeat the same procedure until a re-measurement finds no falsely judged images.
- OK/NG judgements can be changed by using [Send to OK folder] and [Send to NG folder] buttons. In this case, the changes will not be reflected until re-measurement is performed.
