Development of PanDA Form
In this chapter, the development steps of PanDA Form is shown, by the example of unit figure registration form.Create Project
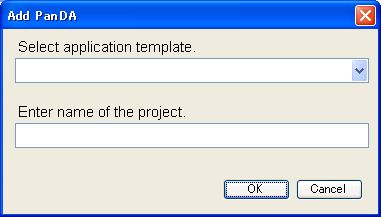
Press Add PanDA on the tool menu of Application Producer.
Then this dialog appears.

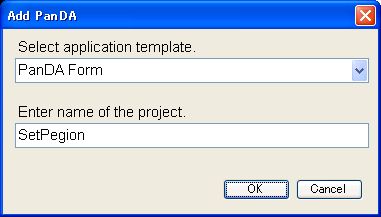
Select PanDA Form on Select application template.
And specify the name of the project. In this example, set "SetRegion".

Press OK then skeleton code is created, and opened by VisualStudio.
Edit Form
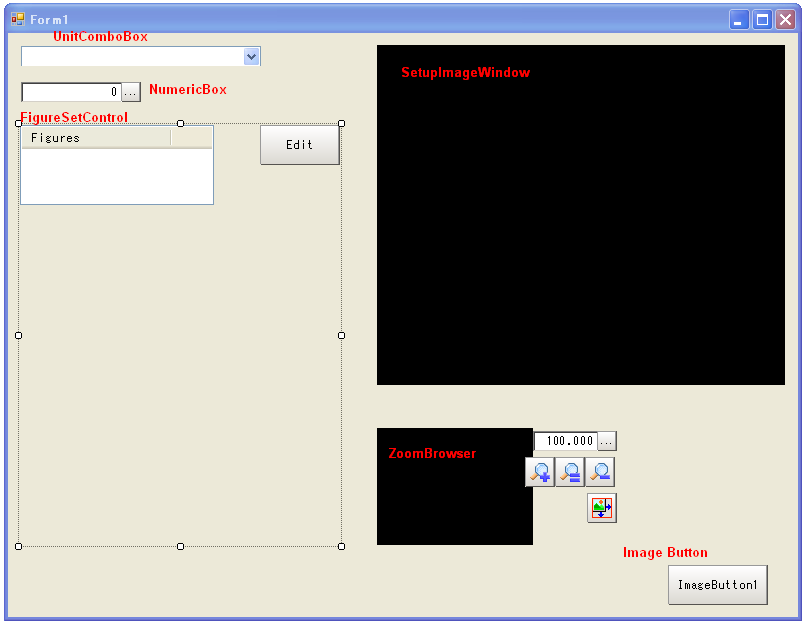
Open Form.vb by form designer, and add controls as necessary.
In this example, these six controls are used.
| Class name |
Object name |
Purpose |
|---|---|---|
| UnitComboBox |
UnitComboBox1 |
Select processing unit |
| NumericBox |
NumericBox1 |
Set figure number |
| FigureSetConbtrol |
FigureSetControl1 |
Add and edit figure |
| SetupImageWindow |
SetupImageWindow1 |
Display image and figure position |
| ZoomBrowser |
ZoomBrowser1 |
Change zoom position and reate |
| ImageButton |
ImageButton1 |
Close form |

Select added controls and set properties as necessary.
In this example, set property values as below.
| Control name |
Property |
Value |
|---|---|---|
| NumericBox1 |
MinValue |
0 |
| DecimalDigits |
0 |
|
| FigureSetControl1 |
ImageWindow |
SetupImageWindow1 |
| FigureKind |
1 |
|
| DataType |
UnitData |
|
| ZoomBrowser1 |
ImageWindow |
SetupImageWindow1 |
Implement event procedure
In this example, selected unit or figure number is changed, it is informed to FigureSetControl.
Pressing button closes form.
In addition, it is possible to define system event procedure by adding the controls below, and define event hander for them.
In this example, these events are not used.
| Control name |
Event |
|---|---|
| On Measurement initialization |
|
| On refreshing measurement display |
|
| On outputting measurement results |
|
| Just after switching scene |
|
| On receiving serial commands |
|
| On receiving parallel commands |
|
| On receiving Option Event |
|
| On error |
Implement multi-language
In order to switch languages of the messages displayed on the screen according to the system setting, create message files for each language, and implement procedures of loading and setting messages in SetMessageText().
In this example, set message text to button on Setting Form.
Message file is written in UTF-8 as below.
Build project and test
Build the project from the menu of VisualStudio.
Then the file "SetRegion.exe" is created, and copied on "Release_XP" folder on current workspace.
Edit Release_XP\Toolmenu.ini and add program file name. Then you can start your PanDA Form by these method :
- [External tool] menu of FJ software menu bar
- Add tool button window
Debug
Follow these steps to debug created module with Visual Studio.
(1) Build the project in Debug mode.
(2) Start FJ software from "Start" menu of Application Producer toolbox.
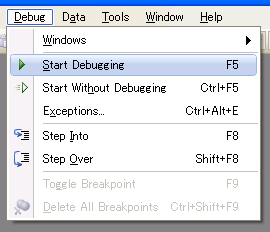
(3) On Visual Studio menu, select [Debug] -> [Start debug].
