Measurement Parameters (Scan Edge Positions)
Measurement parameters can be changed as needed to address unstable measurement results.Normally, the factory default value will be used.
After changing a setting, check whether measurement can be done properly by performing an actual measurement.
- In the "Item tab" area, tap [Measurement].
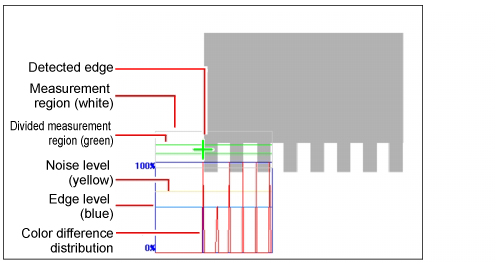
The edge profile of the measurement region is displayed as a graph in the "Image display" area.
- Set the value of each item in the "Display area" area.
| Set value [factory default] | |
|---|
| | Specify the area for which the edge profile is displayed.It should be a sequential number decided when the area was divided. |
| | | Specify enable/disable for the displayed divided area.When disabled (unchecked) is specified, that area is not measured. |
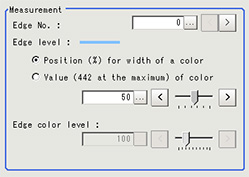
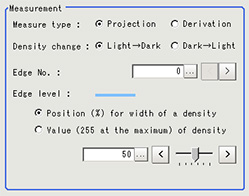
- Set the value of each item in the "Measurement" area.
| Set value [factory default] | |
|---|
| | Specify the edge number used to extract edges. Edge numbers are assigned to detected edges starting from 0 and going on in the direction from the start point (the arrow point) to the end point (the direction of arrow) in the selected area. |
| - Position (%) for width of a color
- Value of color
| |
| | This emphasis level can be specified only if the edge color to detect is specified. |
| Set value [factory default] | |
|---|
Measure type | | This sets the type of edge measurement. |
| | Select whether a black-to-white change or a white-to-black change should be recognized as a density change in the specified region. |
| | Specify the edge number used to extract edges. Edge numbers are assigned to detected edges starting from 0 and going on in the direction from the start point (the arrow point) to the end point (the direction of arrow) in the selected area. |
| - Position (%) for width of a density
- Value of density
| |
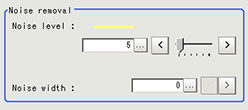
- If necessary, set each item in the "Noise removal" area.
| Set value [factory default] | |
|---|
| | When detection is affected by noise, increase this value. |
| | Set the width for judging noise. When detection is affected by noise, increase this value. |
- In the "Approximate line" area, specify the point to be used for the calculation of approximate lines.
| Set value [factory default] | |
|---|
| | When a check is placed at [ON], an approximate line is found by excluding the points with large deviation among the measured points. |


