Model Registration (Flexible Search)
Register the parts to measure as the model.
A total of 5 models, 0 through 4, can be registered, with no restriction on the size.
If a model has different printing qualities and shapes, more than one models should be registered.
The position at the time of registration is also registered in the model information.Place the measurement object in the correct position when registering a model.
- In the "Item tab" area, tap [Model].
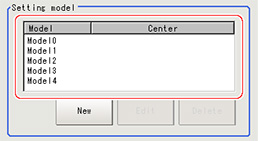
- In the "Setting model" area, select a model and tap [New].
- Use the drawing tools to specify the model registration range.
- In the figure setting area, tap [OK].
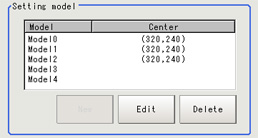
The model is registered and its center X and Y coordinate values are displayed in the "Setting model" area.
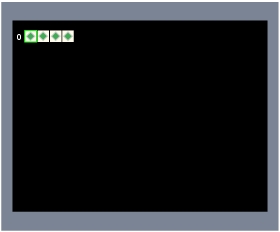
The image specified for the model is displayed in the "Image display" area.
- To register two or more models, repeat the Steps
 2to
2to 4.
4.
Important
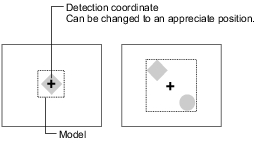
- When a model is registered, the center of the model is registered as the detection point.A detection point is a point output as a measurement value.If multiple figures are combined, the central coordinates of the circumscribed rectangle are registered.
Changing Model Parameters
Model parameter values can be changed as needed to address unstable measurement results or to increase the processing speed.Normally, the factory default value will be used.
After changing a setting, re-register the model.
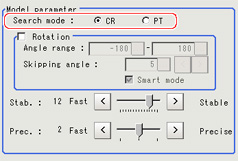
- In the "Model parameter" area, select the search mode, then specify a value for each item for that mode.
| Set value [factory default] | |
|---|
| | Search for normalizing the brightness.This method can provide stable measurement when there is fluctuation in the overall brightness and when the image has low contrast. |
| Measures the degree of matching with the model profile.This method can measure at higher speed when the rotation angle has a wide range. It is available only when a 0.3 megapixel color camera is connected. |
| Set value [factory default] | |
|---|
| | When the measurement object is rotating, place a check at "With rotation" and specify how many degrees the model created rotates each time and through what range of angles.A smaller skipping angle increases stability, but slows down the processing.The normal direction is clockwise. |
| | | |
| |
| | Checking the "Smart mode" option enables a high-speed rotation search.However, the stability may be lowered when the model shape aspect ratio is large or when the NOT mask is used. |
| [The default value depend on the connected camera.9 or 12] | Specify which is to have priority, measurement stability or speed. If lowering stability does not speed up processing, it is likely that many candidates have been detected.In this case, specify a larger value for "Candidate LV" or "Stab." |
| | Specify which is to have priority, measurement positional precision or speed. |
| Set value [factory default] | |
|---|
| | This item specifies the rotation angle range for searching.The normal direction is clockwise. |
| | If lowering stability does not speed up processing, it is likely that many candidates have been detected.In this case, specify a larger value for "Candidate LV" or "Stab." |
