Performing Test Measurement
Test whether the intended measurement processing can be performed with the current setting contents.Look at test results and adjust the property settings of each processing unit.
Perform measurement according to the conditions set in the displayed scene.
- Display the Main screen (ADJUST window).
- For the test conditions on the ADJUST window, set the following items.
| |
|---|
| Place a check here when the measurement results on the ADJUST window are also to be output.Remove the check when test measurement for the device only is to be performed without results being output. |
| Place a check here when continuous measurement is to be performed. Tapping the [Measure] button starts continuous measurement. |
- Tap [Measure] in the Toolbar.
Measurement is performed.
 Note
Note- With continuous measurement, the [Measure] button changes to the [Stop meas.] button during the measurement.To stop continuous measurement, tap [Stop meas.].
- Check measurement results.
- If necessary, adjust the setting values for each processing unit again.
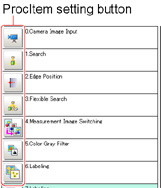
Moving to the property window can be done directly by tapping the button of any processing unit set in the flow.
 Note
NoteImportant
- The measurement interval and display update interval will vary for continuous measurement with test measurement settings and continuous measurement with serial commands/parallel commands.
Evaluate the measurement interval and display update interval by watching actual operation.
 Logging Measurement Values and Measurement Images

