Creating the Setting Window User Interface (UI)
Create an execution file for the interface to set the parameters required to perform internal processing.
Adding a Control
- In Solution Explorer, right-click the form to be edited and select [Display designer].
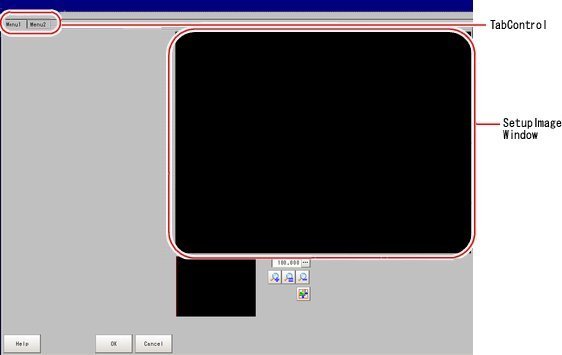
- Select the required control from the toolbox, and arrange it on the form.
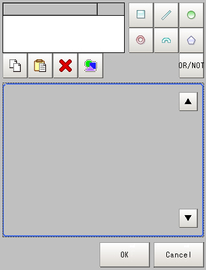
The following controls are arranged in the NormalForm.vb form, which is included in the model project:
Setting Control Properties
Set the properties for the added controls.
In the sample program, "FigureSetControl", "ValueSetControl", "TabControl", and "GroupPanel" are set.
In the sample program, "FigureSetControl", "ValueSetControl", "TabControl", and "GroupPanel" are set.
- Right-click the controls in the form and select [Property].
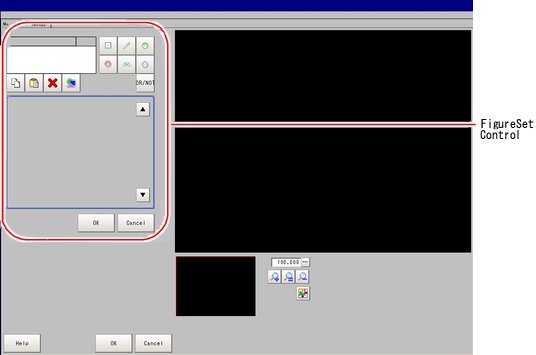
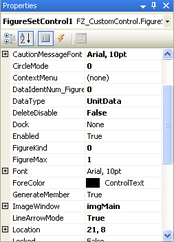
- Set the following items for "FigureSetControl".
Table: FigureSetControl properties Set the number according to the figure number in the processing item MS. Specify "0" here because the figure number 0 is defined for model registration in the processing item MS.
 Creating Internal Processing (MS)
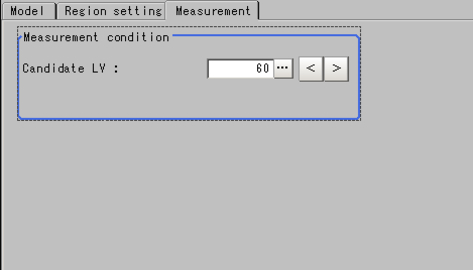
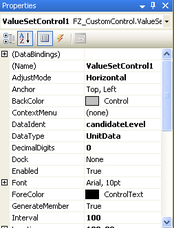
 - Set the following items for "ValueSetControl".
Table: ValueSetControl properties Associate this item with the data name in SetUnitData.cpp of the processing item MS. In the sample program, specify "candidateLevel" as defined in SetUnitData.cpp.
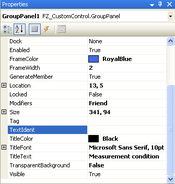
Creating Internal Processing (MS) - Set the following item for "GroupPanel".
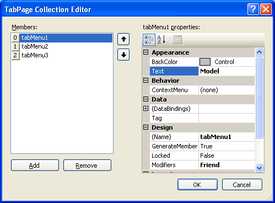
- Set the following item for "TabControl".
Initialization
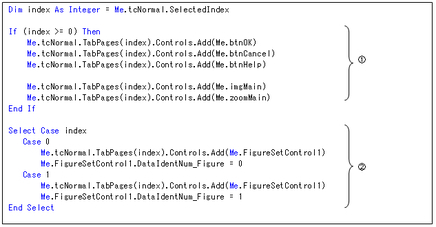
In the "Form_Load" event of the FZ-Main form, write the initialization process of the controls added to the form.
The initialization of the processing item mainly performs the following two kinds of process:
The initialization of the processing item mainly performs the following two kinds of process:
Use the UnitDataN/UnitDataS() API to get the settings data. The data name set for the argument is the one that is specified in the MS external interface (UnitData.cpp).
When custom controls are used, data getting, data setting, and data range checks can be automatically performed by associating the data names with those set in the MS item in the custom control properties setting. In that case, the process above (such as getting the settings data) is unnecessary.
Since custom controls are used in the sample program, the process of getting the data is not written. Settings relating to image display and tab control are performed.
Writing the Code for Added Components
For a control added to the form, write the process to be executed upon occurrence of the event. In the sample program, the process to be executed when switching tabs is written.